LOTR Rise to War Guide - Tips and Tricks for Starting a Fellowship
Aerith 2021-10-12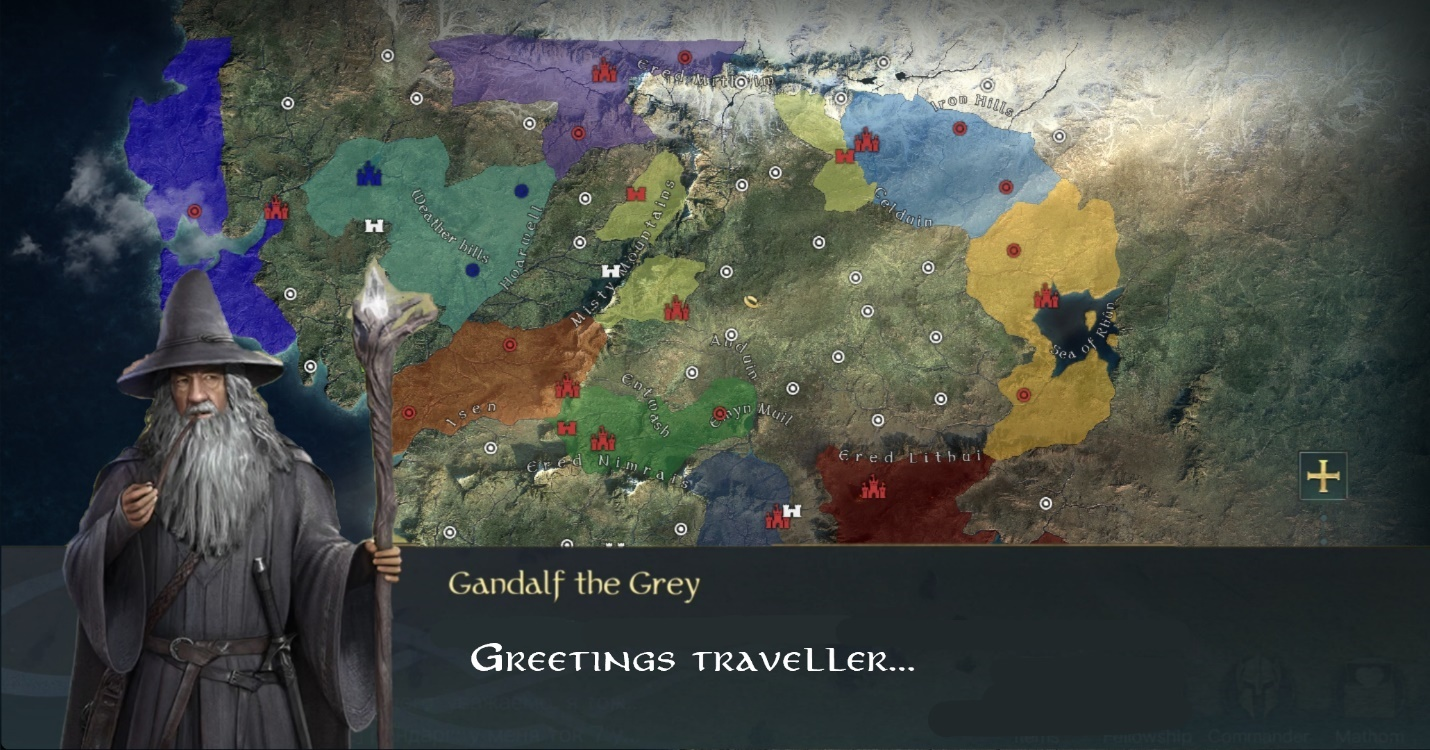
A greeting from Gandalf the Grey.
Lord of the Rings: Rise to War is a real-time strategy (RTS) game that features server-wide combat as Factions war against each other to acquire The One Ring of Power. Cunning and strategy can take you far in this game, but nothing beats having experience and knowledge. Use these tips and tricks to help you rise to the top of the leaderboards and maximize your efficiency in acquiring power as a free-to-play (F2P) player.
Note: The headers denote the theme of the tip, and the bolded words are the actual tips. The additional text explains why these tips are useful. These tips may not be as useful to those who are not strictly F2P.
Tip 1: The Proper Time to Join a Server
JOIN EARLY IF YOU’RE PLANNING ON PLAYING WITH AN ORGANIZED GROUP OF PLAYERS.
If you have already joined with a large Fellowship of players, then it’s best to get in early or risk not getting in at all. Factions reach their maximum capacity quickly and it is very costly (gem-wise) to switch Factions once in-server. If you’ve missed your chance, wait till inactive players have been removed from the server or choose a different Faction (if you don’t mind the cost of switching Factions).

"A wizard is never late. Nor is he early. He arrives precisely when he means to."
THE BEST TIME TO JOIN A SERVER IS AN HOUR OR TWO BEFORE REFRESH TIME (0 UTC or 8 PM EST).
Refresh Time is a daily occurrence that happens at 0 UTC (i.e., 8 PM EST). It signifies the start of a new day and players can acquire free Tavern Tips and a Daily Door Prize (i.e. Mathom Chest vouchers). It’s important to join an hour or two before Refresh Time because that give you enough time to unlock Tavern Tips and acquire your free Daily Door Prize for ‘Day 1’ before collecting it all again for ‘Day 2’. Essentially, you get twice the daily rewards for having only played less than a couple of hours. Additionally, The Journey Begins server event, which enables you to acquire commander experience from Tavern Tips once complete, may be finished or closed to being finished by the time you join.
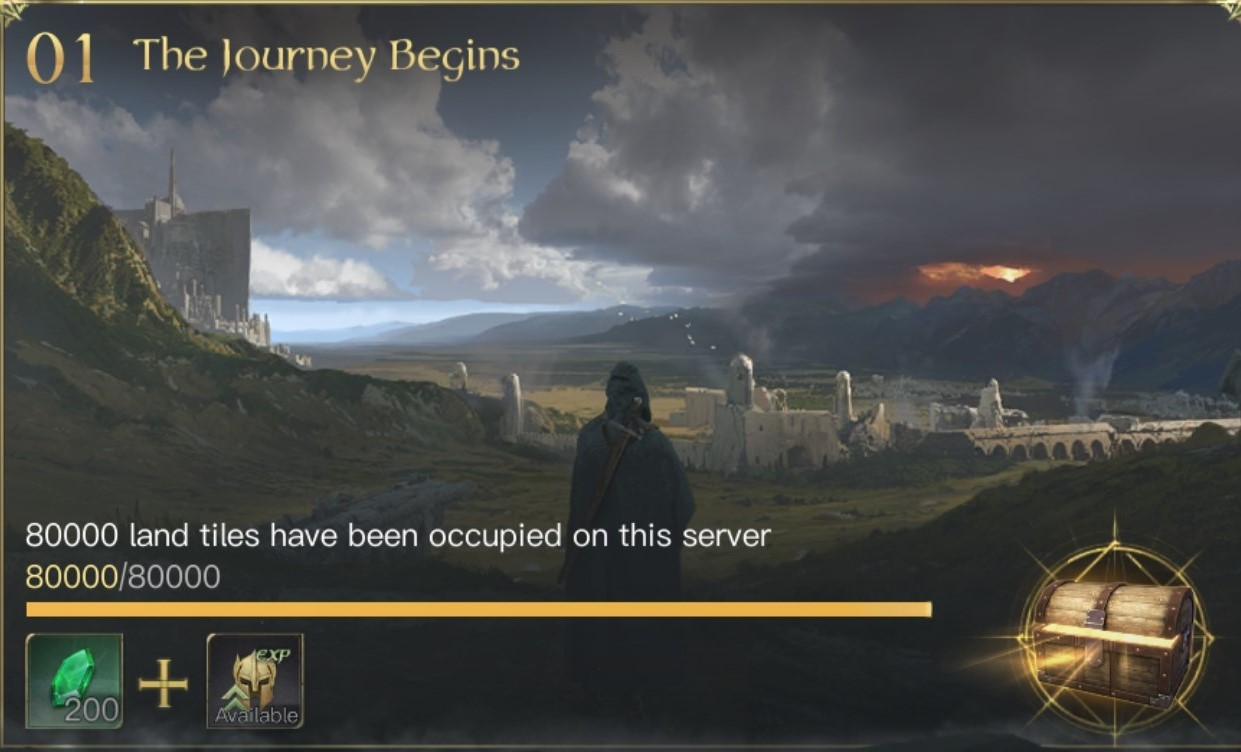
The Journey Begins server event.
Note: Save your Tavern Tips until The Journey Begins server event is completed.
Tip 2: Choosing a Faction/Fellowship
JOIN A FELLOWSHIP FROM THE #RECRUITMENT-NOTICE-BOARD IN THE RISE TO WAR DISCORD SERVER.
Rise to War is a multiplayer, strategy game that puts heavy emphasis on teamwork. While you can beat minor objectives on your own, you will need a Fellowship for Keeps and a strong Faction to win the season. Joining a Fellowship from the official Rise to War discord server is your best chance at having a strong start. Specifically, look for Fellowships that have beta players in them as you will learn the quickest from those who have already played the game.
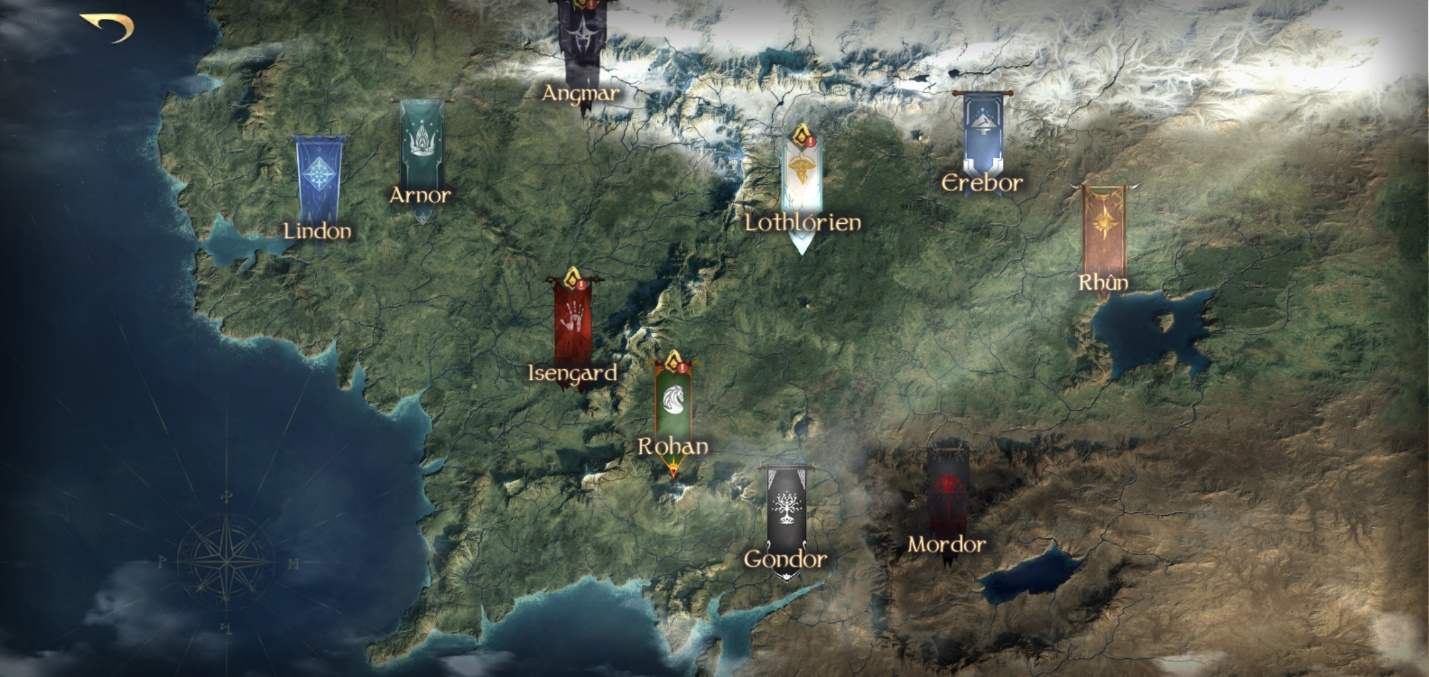
CHOOSE FACTIONS WITH ONLY ONE OR TWO NEIGHBORING FACTIONS (UNLESS YOU’RE WITH A GROUP).
Many Factions start on the outskirts of the Middle Earth map. However, some of them start sandwiched between two or more Factions (ex. Arnor is sandwiched between Lindon, Angmar, Lothlórien, and Isengard). This puts them at a disadvantage as they can be attacked/invaded from all sides. A strategic place to start (especially if you’re new) is a Faction that only has one or two neighboring Factions. This will allow you to grow without the worry of having your location invaded by more than two opposing Factions.
Tip 3: Strengthening Commanders
FOCUS ON LEVELLING UP ONLY TWO COMMANDERS.
Every player is given two free commanders at the start of the game. One is their corresponding Faction commander and the other is a different Faction commander. It is best to focus on levelling these two commanders (unless you acquire a higher tier commander early game) because you will run out of resources quickly if you try to level up to three or more commanders at the same time. Additionally, low-level commanders will have more difficulty in acquiring higher power tiles.
SPEND YOUR COMMANDER GIFTS ON GETTING TO RESPECT LEVEL 5 (R5) FOR CERTAIN COMMANDERS.
Avoid spending commander Gifts on acquiring new commanders in the early stages of the game. Having many commanders at this stage is not useful as you will only be able to focus on two. Focus on increasing the respect level of the commanders you already have to R3 and R5 (i.e. Respect levels 3 and 5) as this will unlock additional skills in their skill tree. Some of these R3/R5 skills are incredibly useful (ex. Éowyn’s White Lady of Rohan title). Additionally, relics are items that will be incorporated later seasons of the game when a commander reaches R10, so it is vital that you focus on the respect levels of the commanders you already have.
STRENGTHEN YOUR BLUE EQUIPMENT (AND SOME OF YOUR PURPLE).
You can strengthen equipment in the ‘Items’ interface in-game. It costs approximately 6 pieces of the same tier of equipment to maximize the strength of one blue piece of equipment. However, you will easily acquire enough blue equipment to replace the ones you spent so strengthen them as soon as you can. Additionally, you will acquire purple equipment throughout the game and they come with perks. Be mindful of these perks as some are very useful compared to others. Strengthen the ones with useful perks at your discretion.
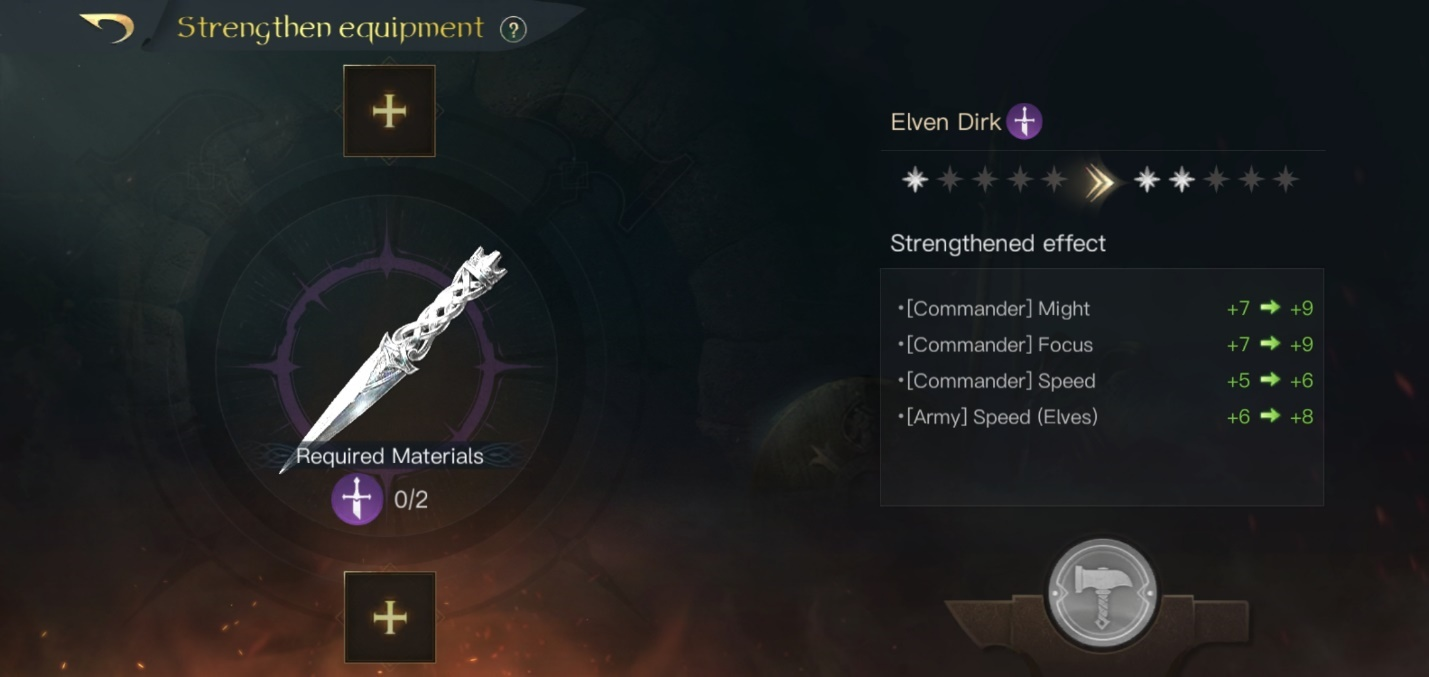
Elven Dirk Strengthen equipment interface.
Note: Blue helmets are rarer than blue weapons or armour so strengthen them when you have enough.
ONLY USE TAVERN TIPS ON YOUR TWO MAIN COMMANDER’S EARLY GAME.
Once The Journey Begins event is complete, you’ll be able to acquire commander experience from Tavern Tips. Only use your two main commanders to complete these tips as this will maximize the efficiency of levelling them. Make sure to buy Tavern Tips Speed+ (i.e. speed-ups) from your Fellowship store.
MOCK BATTLE ON HIGHER-LEVEL RESOURCE TILES (170+ POWER IS PREFERRED).
Mock Battles are an efficient way of gaining commander experience without losing troops. It only costs action points, stamina, and grain for a corresponding amount of experience from resource tiles. The higher the tile power, the more efficient it is to do Mock Battles. Refrain from doing Mock Battles early game as you will want to save your action points for Harvesting and you probably won’t have tiles that are high enough in power for the commander experience gain to be worth the cost.
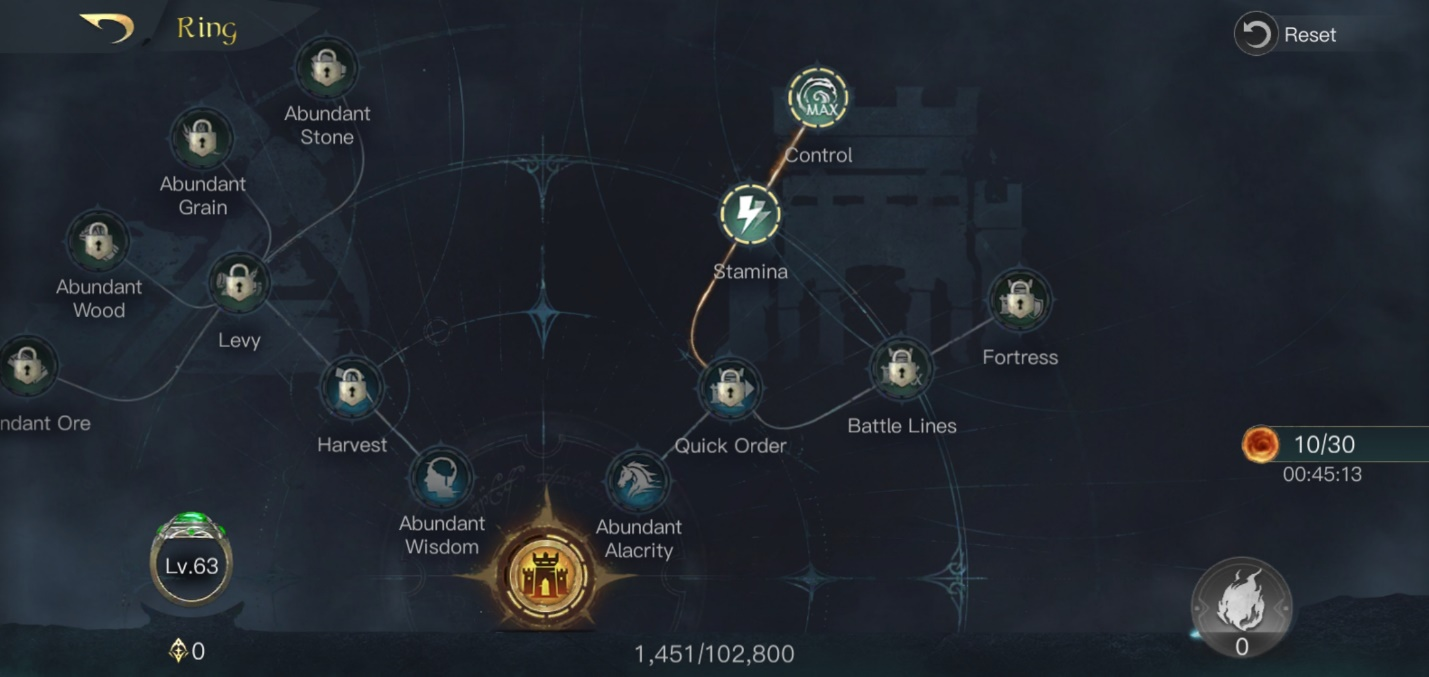
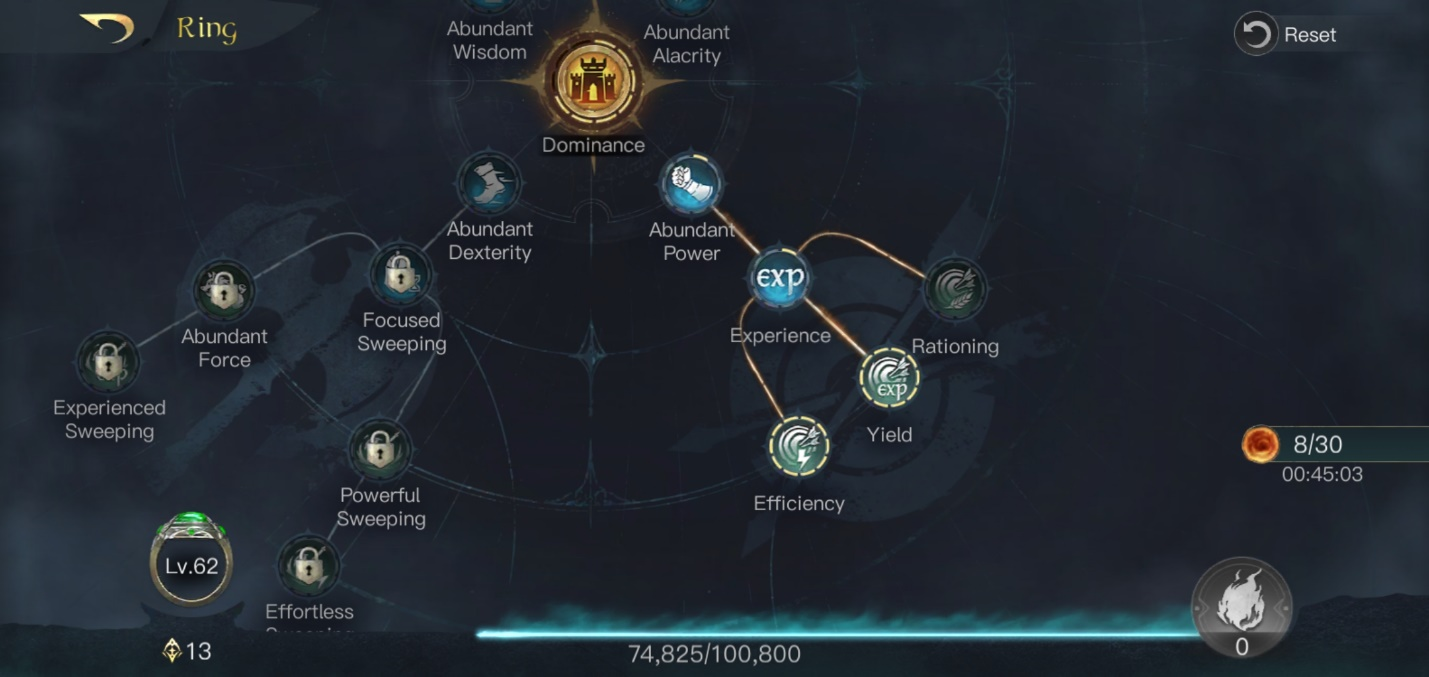
Tip 4: Early Game Ring Upgrades
ALWAYS UPGRADE DOMINANCE WHEN AVAILABLE.
Dominance will increase your tile capacity limit which will enable you to acquire more resources per hour.
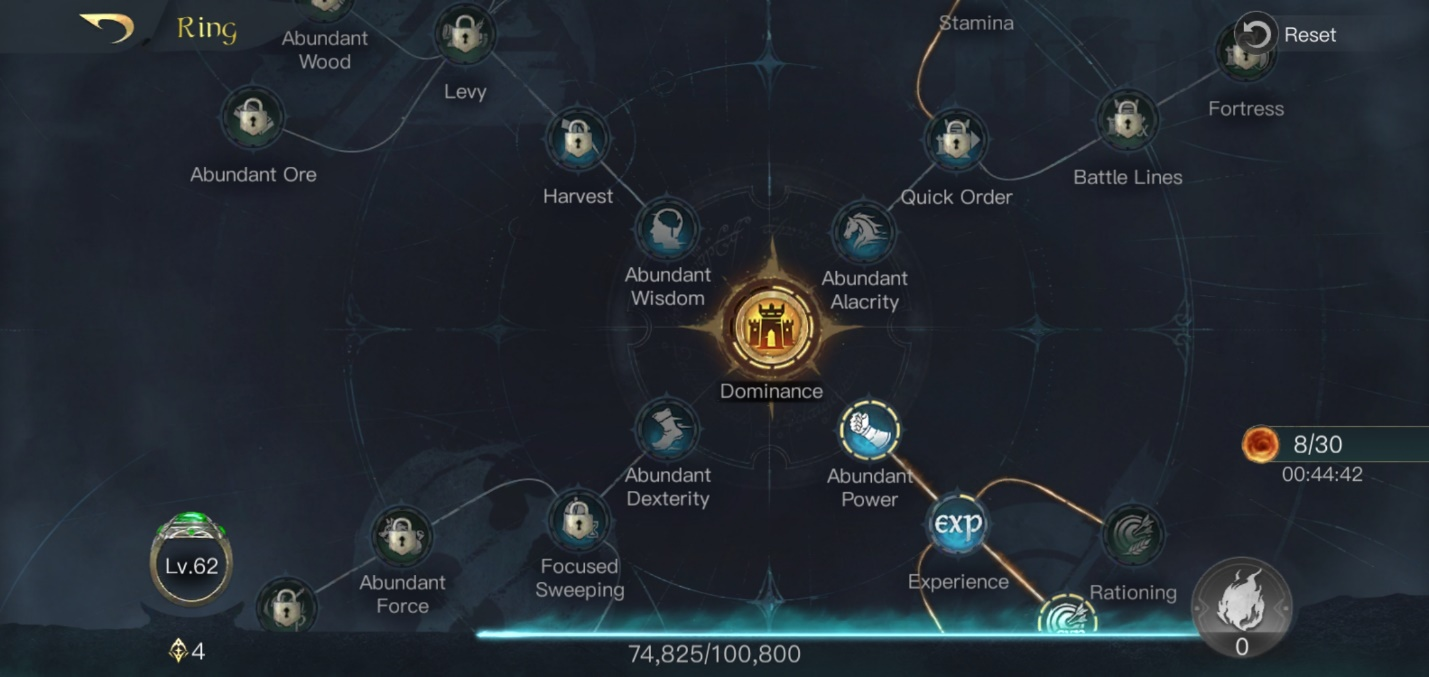
UPGRADE CONTROL.
You can only upgrade Control once your ring has reached level 10 so you will have to wait until you can unlock the ring branch that Control is on. Control is important because it increases the number of ability points you can have to 30 while reducing the time it takes to replenish them (i.e., you will acquire 30 ability points in 24 hours instead of 20). Ability points enable you to Harvest resources from tiles and Mock Battle. Reset the ring once Control is maximized to return the two points you spent on Abundant Alacrity and Quick Order which can be put to better use.
UPGRADE EFFICIENCY AND YIELD.
These two will increase the efficiency of your Mock Battles by reducing the stamina cost and increasing the commander experience gain. It is not advised to bother with Rationing as it will become negligible late game when you have a higher grain production.
UPGRADE STAMINA.
At this point, you should be secure enough in your resource productions that you can afford to use extra stamina on your commanders. Maximizing Stamina will give your commanders 30 extra stamina points.
UPGRADE ABUNDANT POEWR AND ABUNDANT WISDOM.
These last two are important as they boost a commander's Focus and Might in battle. After this, it’s up to your discretion on what you choose to upgrade depending on your playstyle.
Note: Fortress is important for PVP as it will give your forts the durability to withstand attacks and waste enemy stamina.
Tip 5: Building Priorities
FOCUS ON ONE OR TWO UNITS FROM THE FACTION QUARTERS TO ACQUIRE HIGHER TIER UNITS.
You should focus on getting tier two units in the early game. Additionally, only focus on one or two types of units to minimize the waste in resources spent for units you’ll never use. Ideally, they should most likely be a heavy unit (high defense stats) and a high damage unit. However, some Factions offer units that can do both (ex. Rohan’s mounted units work well as either or on their own). Build your chosen tier three units as soon as you can.
UPGRADE THE MILITARY ACADEMY TO INCREASE THE NUMBER OF TROOPS YOUR COMMANDER LEADS.
The Military Academy allows your commanders to lead more troops. This increases their power and reduces losses when hitting high-power tiles. Upgrading the Military Academy to level 10 should be your main priority.
UPGRADE FACTION QUARTERS TO INCREASE GOLD GAINED BY LEVY.
Upgrading the Faction Quarters is the sole way to increase the amount of gold you gain per levy. The four Faction Quarters should not take precedence over buildings like the Military Academy, but they should be upgraded to the maximum before upgrading your Main Hall again.
Rohirrim Quarters
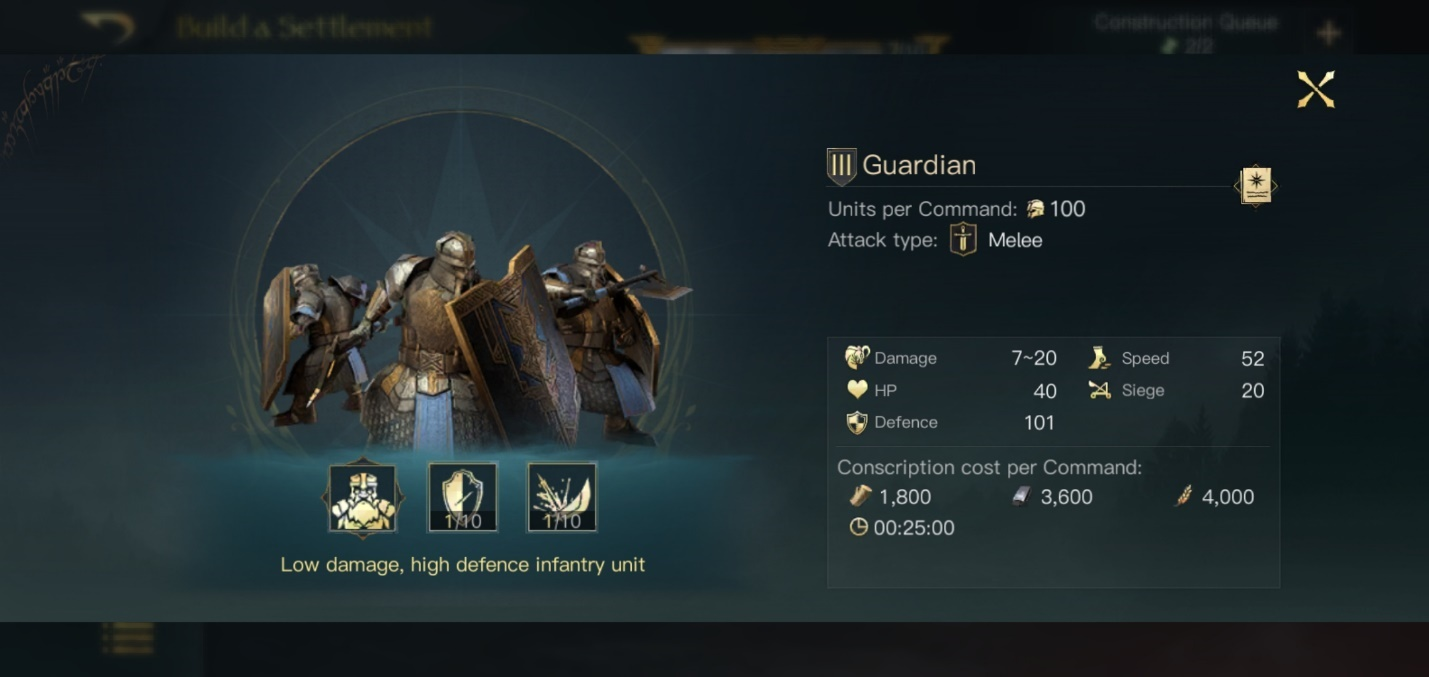
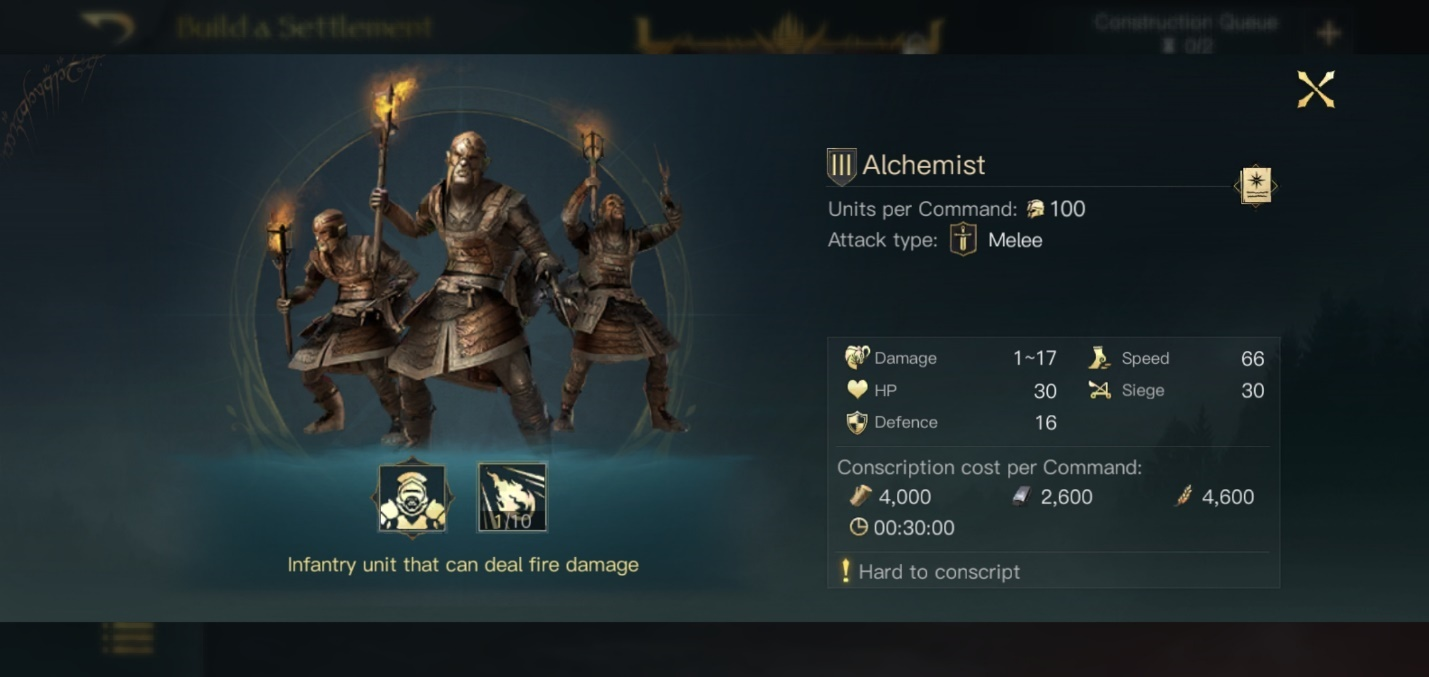
UPGRADE THE DRAWVEN FACTION’S FOOTMEN TRAINING GROUNDS (FOR GOOD FACTIONS) OR THE BREAKER LAIR (FOR EVIL FACTIONS) FOR SIEGE UNITS.
Erebor’s Guardians are the best Good units for siege that don’t cost coin whereas Isengard’s Alchemists are the best Evil units for siege. Consider getting these troops around to the time that your Faction decides to start capturing Control Points.
ACQUIRE YOUR FACTION’S SPECIAL UNIT.
By the time you consider getting your Faction’s special unit, you should be at Main Hall level 9 with Military Academy level 9. You’ll most likely not have all your buildings maximized but don’t waste your resources on them yet. Fulfill the base requirements for getting to Main Hall level 10 and acquire your Factions special units before doing anything else (even before acquiring Military Academy level 10). Conscripting your Faction special units takes a very long time when you first get them so starting as soon as possible is key. Additionally, these units will give you an edge against your opponents in PVP early on.
Tip 6: Maximizing Resource/Experience Gain
ALWAYS MAXIMIZE YOUR TILE LIMIT IN THE FIRST 24 HOURS OF THE GAME.
The 24-hour buff gives a 50% stamina reduction cost so utilize this to reach your tile limit, even if you’re only capturing 1 power resource tiles. Ideally, this is best done when you acquire a third commander (if you’ve got an invite already) on tiles that deal little to no troop loss. Do not waste the stamina of your main commanders for this.

CONSCRIPT IN SHORT SPRINTS RATHER THAN LONG ONES.
Conscript units in sections (ex. 10 – 20 minutes) rather than in hours. This enables a constant stream of troops trickling in from the Barracks which may reduce the amount of time you have to wait for new troops to arrive. This is especially useful early game when conscripting one command of troops (ex. a set of 50 light cavalry) could take much longer than 10 – 20 minutes.
Note: The Barracks and Apothecary conscript and heal units in batches of one command unit. If you conscript/heal 500 light cavalry, you will get batches of 50 units over the time period that it takes to conscript 500 light cavalry instead of only acquiring the total batch of 500 troops at the very end.
TRY FOR A LEVEL 130/170 BEFORE THE 24-HOUR BUFFS ARE GONE (IF YOU HAVEN’T ALREADY).
The 24-hour buff reduces the number of units killed by 50% so you will lose a lot less if you try while the buff is active. However, this is within reason of your commander level. Ideally, you can take a 130-power tile when your commander level is around 20 and a 170-power tile when your commander is greater than level 20.
Note: Your commander will get a significant boost in stats and extra skill points when they reach level 20 due to their perks.
MAXIMIZE A SET OF POWER TILES BEFORE MOVING TO THE NEXT TIER OF POWER TILES (AFTER 24-HOUR BUFF).
Once the 24-hour buff is finished, you should refrain from taking any more 130/170 tiles as you will most likely lose a lot of troops. Focus on 40/60/90 power tiles (whichever tile you can take comfortably without significant loss) before moving on to the next level. Eventually, you should be able to take 90 power tiles before moving back to 130 power tiles.
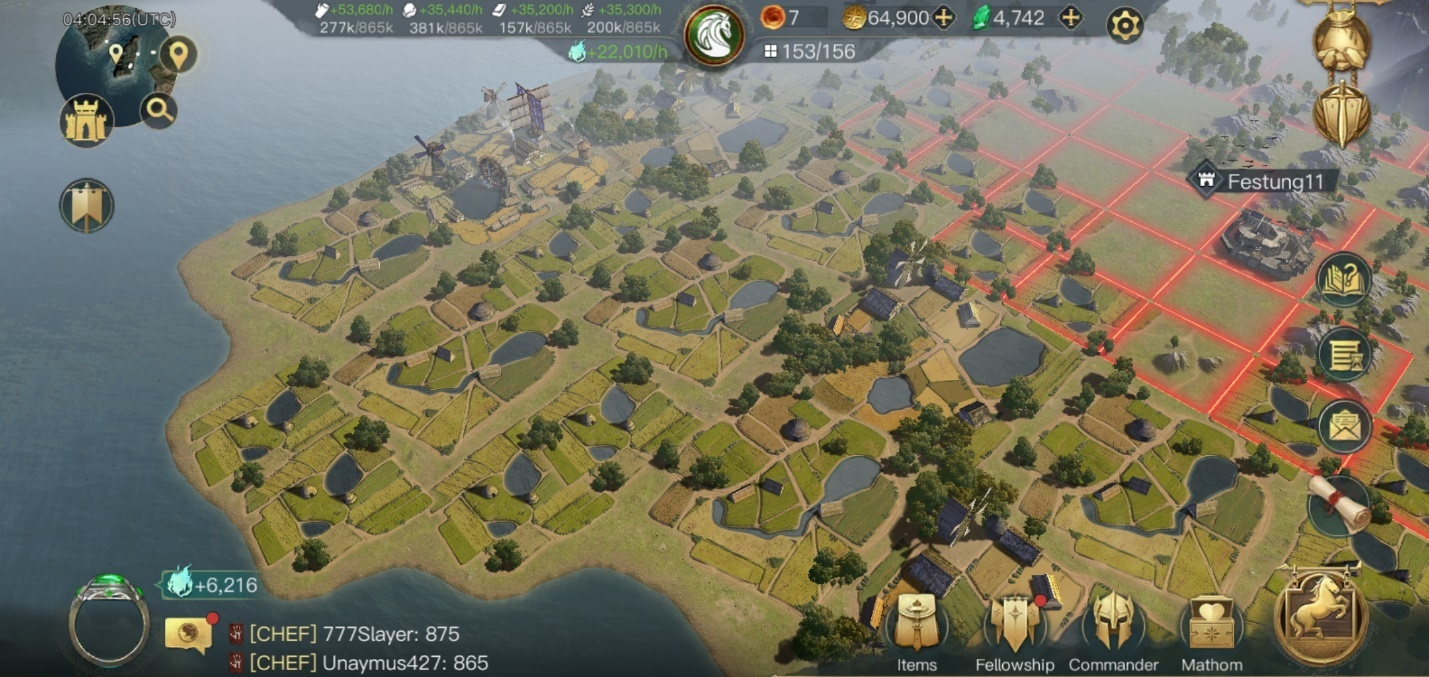
BUILD FORTS AND UTILIZE FELLOWSHIP FORTS TO FIND TILES.
Eventually, you will take all the tiles you can take near your City and you will have to move to find more resources. Use forts to expand your reach and find new tiles. Fellowship Forts can also be used to find resources or build forts.
BUILD FORTS NEAR RESOURCE HUBS.
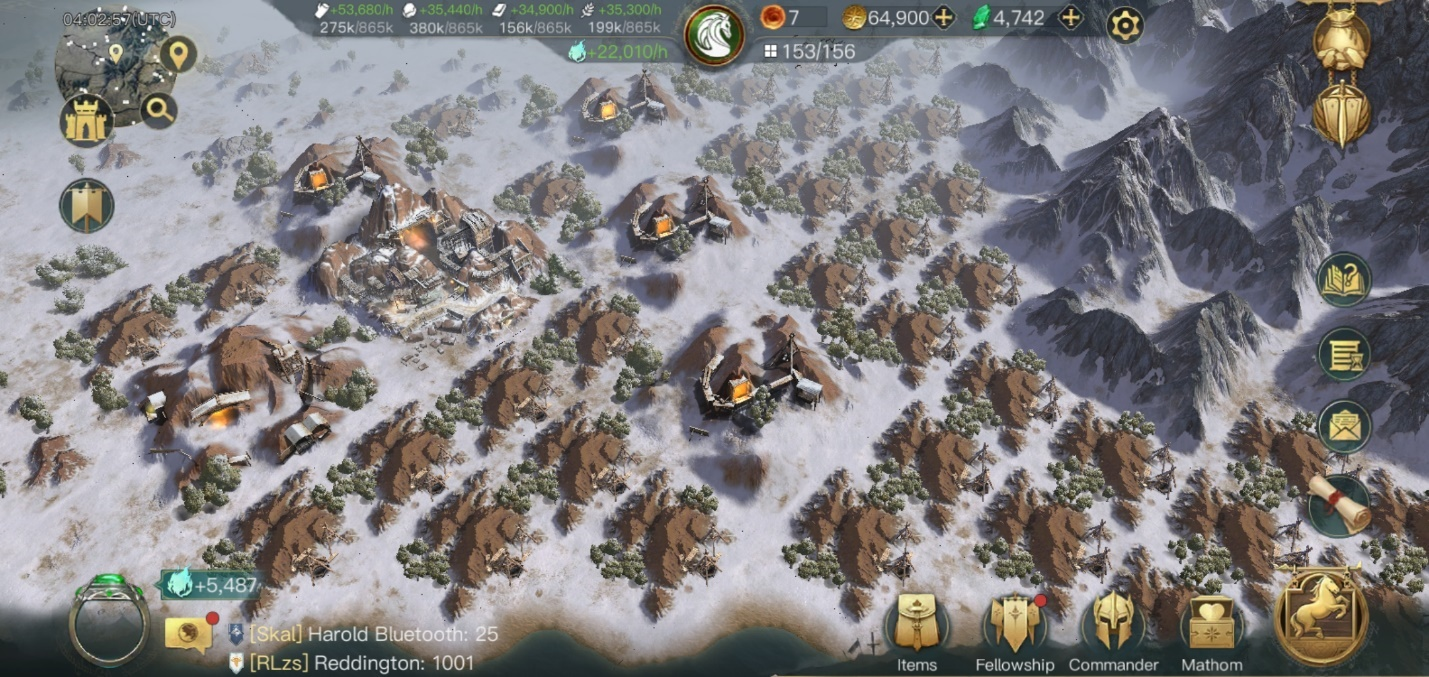
A resource hub is a place where there seems to be a lot of the same resource (ex. the forests around Dol Guldur). Setting up a fort by resource hubs is a good way to avoid running out of tiles to capture. Many resource hubs also have lots of 170+ power tiles located in the same area which reduces the cost of stamina spent pathing.
ACQUIRE A 200-POWER TILE WITH THE HELP OF OTHERS OR WHEN YOU HAVE TIER 3 UNITS AND MATCHING POWER.
A 200-power tile requires a commander that can match the power of the tile and enough units for the attacking commander’s armies to be reinforced twice. The Military Academy will help you match the power of a 200-power tile while your Barracks should hold enough units to take the tile. When attacking a 200-power tile, you have 15 minutes to defeat the defenders. Within that time, you can recall and resend you commander multiple times while reinforcing the commander’s troops in between. Use this to your advantage to wear down the tile defenders. However, an easier way to acquire a 200-power tile is ask for help from those who have already acquired one.
Tip 7: Spending Gold Efficiently
AVOID SPENDING GOLD ON UNNECESSARY FORTS OF ANY KIND.
If you happen to become an officer or leader of a Fellowship, you have the option of building a Fellowship Fort. These are incredibly costly in gold if you’re the sole person who is building the Fellowship Forts. Additionally, refrain from building unnecessary forts as this will save you a lot of gold in the long run. Choose your fort locations strategically and you won’t have to waste gold.
SPEND YOUR GOLD ON TIER 3 UNIT SKILLS (AND MAYBE SOME TIER 2 UNIT SKILLS).
It may be tempting to spend your gold to buff your lower-tier units. However, the cost to upgrade their skills to higher levels increases exponentially and is not worth it for a unit you will never use in the late stages of the game. Avoid spending gold on tier one troops and refrain from maxing out tier two troop skills.
Tip 8: Spending Gems Efficiently
BUY THE 200 GEM MATHOM CHESTS AND/OR TAVERN TIPS.
Spending on these will help you get the most commander influence (and equipment) for the least amount of gems. Additionally, Tavern Tips are especially useful early game as they give a certain amount of commander experience similar to taking an 130/170 power tile (however, the experience from tips becomes less useful late game). You’re guaranteed around 120 to 150 commander respect from refreshing your Tavern tips (early game) for 200 gems whereas you may get 10 to 300+ commander respect from the 200 gems mathom chest.
ONLY SPEND GEMS ON SPEEDUPS FOR IMPORTANT BUILDINGS.
The only buildings that are important enough to warrant speeding up the building process early game are when you’re about to unlock higher tier units or when you’re about to upgrade the Military Academy. Refrain from speeding up building times for buildings that do not contribute towards attaining the Military Academy.
SAVE 500 – 1000 GEMS FOR EMERGENCIES.
Always have a few gems on hand in case emergencies come up (ex. needing to recall quickly).
Thank you for reading this article and I hope you found it helpful. Now sod off!
Aerith